Laser etching stainless steel with a 40w CO2 laser

In my shop I have the Flux Beambox 40w CO2 laser. Up until today I had used it to laser etch and cut wood & acrylic. The only metal work I had ever done with it was removing painted coating from aluminum.

These are laser etched business cards I made for an event HackSI was attending.

Recently I learned that if you coat stainless steel with a chemical compound you could laser etch onto it and it would stay. Specifically the chemical is “molybdenum disulfide”. This can be found in “CRC Dry Moly Lube“. Of course I had to give this a try.

I ordered the CRC from Amazon and a batch of stainless steel drinking flasks. I then picked up some “Denatured Alcohol” at Walmart and I was ready to go.

The green painters tape was used to tape the top of the flask so that I wouldn’t get any of the Dry Moly on it.

The first step is to tape up the areas that you don’t want the Dry Moly to get on the material. For the flasks this was around the lid area. Then I sprayed a very thick coat of the lube onto the front of the flask. Making sure it was nice and thick as well as evenly coated.

I let this dry for about 10-15 minutes before dropping it into the laser. Now comes the fun part. For my first run, I set the laser to run at 50mm per second at 55% power. This actually turned out to work very well.

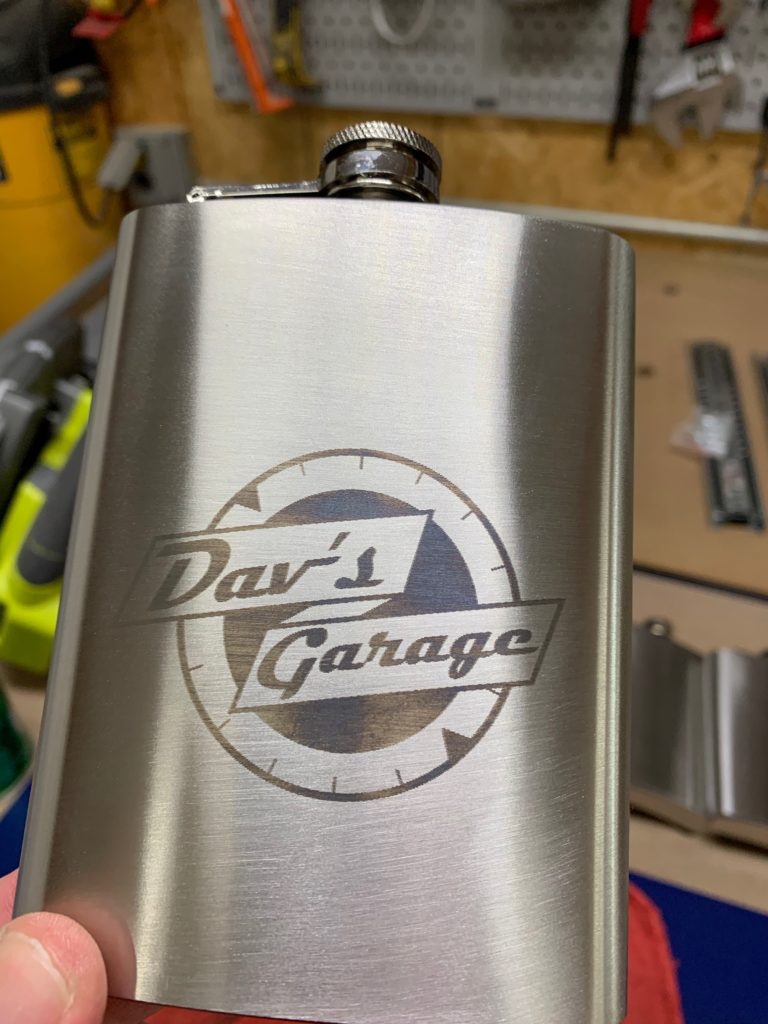
As you can see, some of the darker area at the bottom are a little light on the etching, I think this was because I didn’t put enough of the lube on. So I tried another design but changed up the settings. I went with 95% power at 50mm per second.

That didn’t work as I had expected, the darker areas at the top turned out super light and it created pretty large dents in the stainless. I think the metal is just too thin for that power of the laser.

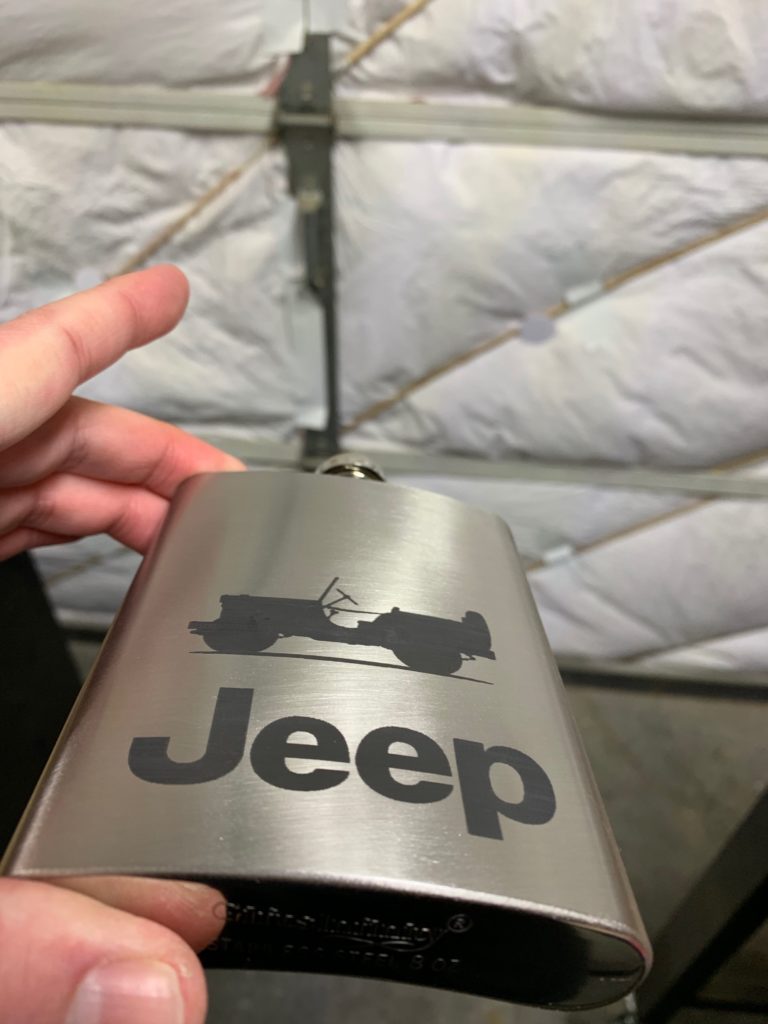
Next up, I went back to using the 50% power at 55mm per second but this time I used 2-3 really good coats of the lube; making sure to cover it really well.

Starfleet Logo for a friend.

Now this one turned out absolutely beautiful. I’m really happy with how this one pops on the metal. At this setting I just need to dial in the proper amount of lube to apply. So I tried a few more times.

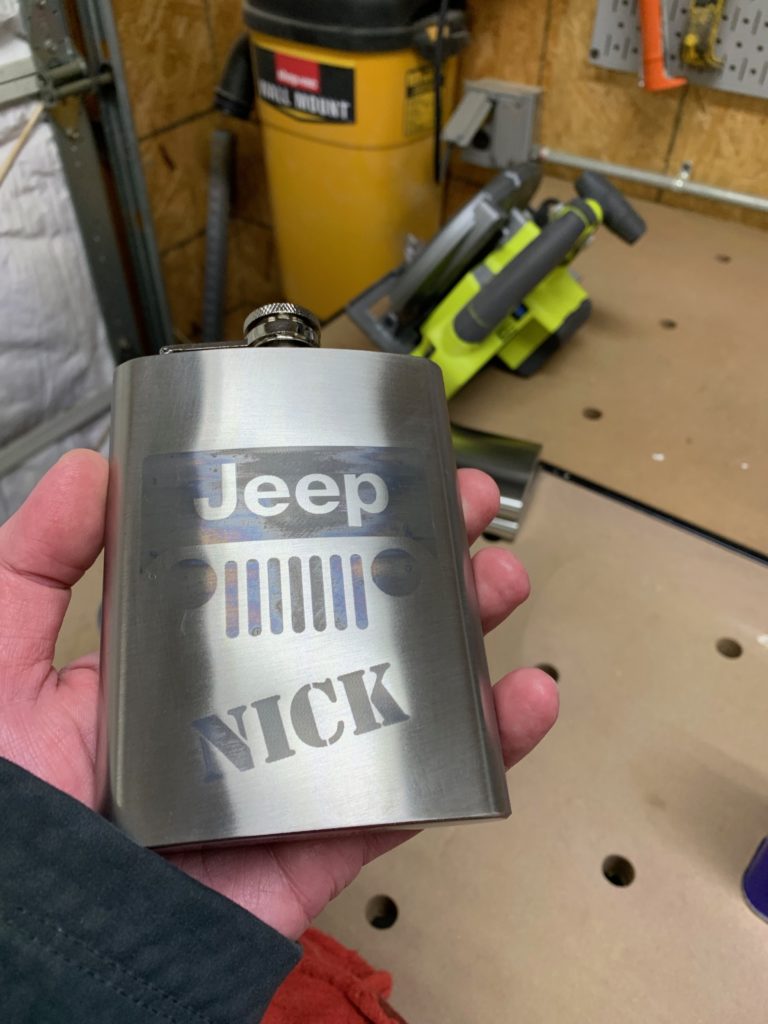
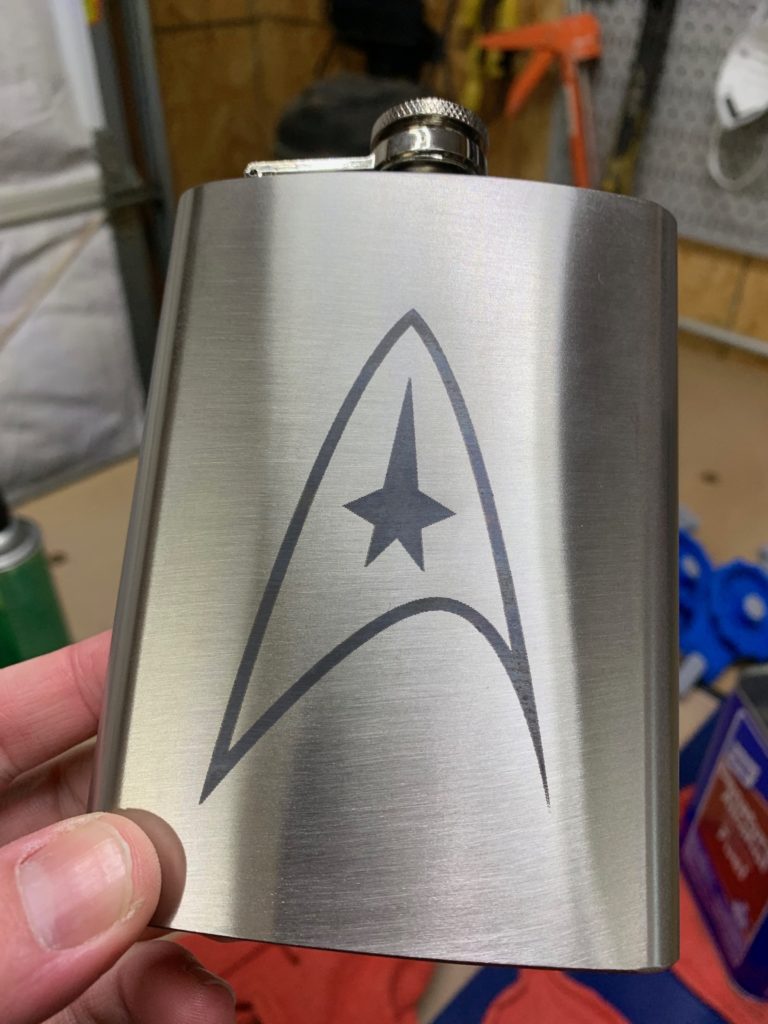
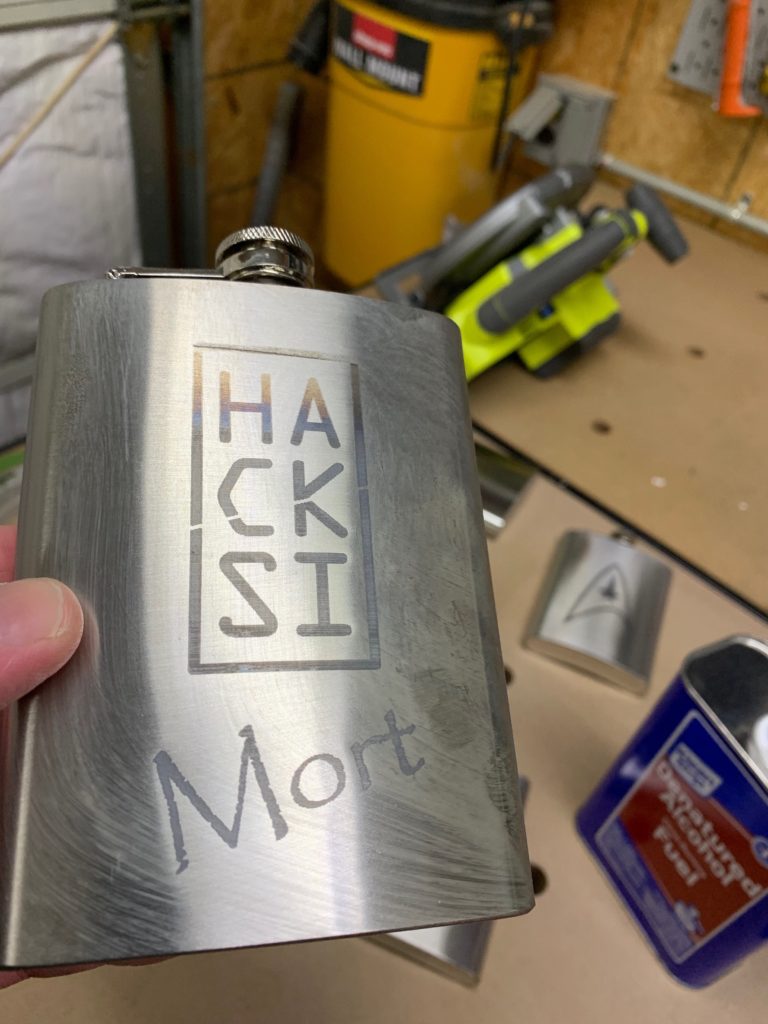
As the day went on I think I finally got the hang of the proper amount of lube to apply and the results show for themselves.

I hope you enjoyed this post!

Adding Kreg Bench Dogs to an existing workbench

In my shop I have the Performax shop system from Menards. In this set up, I have 3 of their workbenches. These benches are pretty nice; they are about 5 1/2 feet long and 2 feet wide and have a 1″ thick MDF top, which makes for a very nice work environment.

What I always ended up doing was just using some bar clamps and clamping my work pieces to the table. This is simply just a pain in the ass.

That’s where the Kreg bench dogs and clamps come in.

These bench dogs and clamps all fit inside of a standard 3/4″ hole, which makes things easier for us. The hardest part of this is picking the distance between the holes. For this I decided to do 8″ in each direction. This gives me plenty of space to work and allows me to add more later, if I find that I need them.

First I started in the lower left hand corner of the table and marked out the first hole at 4″ from the table ends. This became my starting point; from here I used a square, a 24″ straight edge and a 48″ straight edge to start making marks every 8″ in each direction.

Once I had the holes all marked and squared, I picked out a 3/4″ spade bore bit from my Irwin bit collection.

Now comes the scary part, drilling a bunch of holes into a perfectly good workbench. Before I did, I double-checked all of my marks to make sure they are square and are all in line with one another. Now, it’s time to drill out 24 holes.

Be sure to use a face mask if you are drilling into MDF, the dust is toxic and can make you sick if you inhale it. I used a dust mask, gloves and had my ShopFox air filter running while I did this.

This only took me about 10 minutes to do, the key is to take your time and make sure that your drill is level when you make the holes. Once done, I just used my shop vac to clean up all the excess dust.

Look at those perfectly aligned holes. Isn’t that awesome?

After I cleaned up the table, I took my Ryobi orbital sander with some 220 grit sandpaper and gave the holes a light sanding to remove any of the excess wood left from the bore bit. MDF tends to leave some large spirals of wood after it’s drilled out.

The next step was to test my new clamps and bench dogs to see if they worked!

And they did, they worked perfectly! In fact, I think I may have to add bench dog holes to my other two tables.

Hope you enjoyed this post! Let me know what you think in the comments below!